Overview & Context
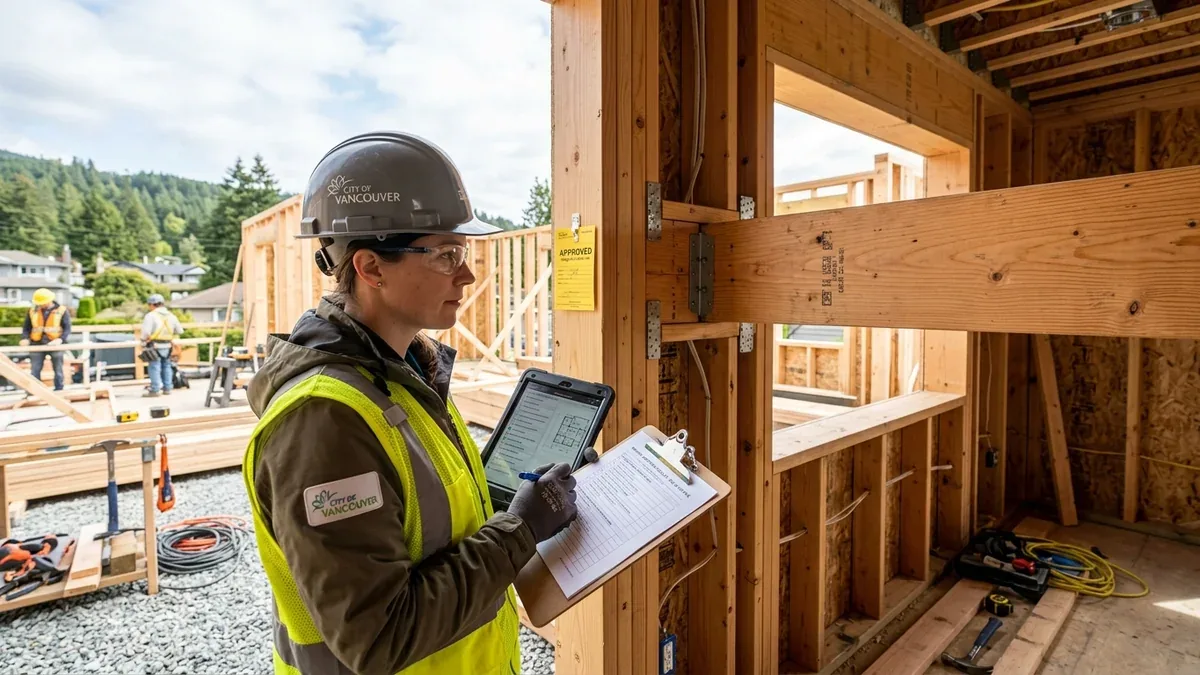
OverviewRenovating an existing home or expanding its footprint with an addition requires navigating a tailored municipal inspection schedule. Because you are modifying an existing structure rather than building from raw dirt, municipal inspectors only inspect the new, altered, or exposed construction elements.
However, the golden rule of BC construction remains strictly enforced: no trade work may be concealed behind insulation, vapour barrier, or drywall until the municipal inspector has signed off on the approved paper set. Premature concealment results in immediate stop-work orders and invasive wall opening mandates.
Step 1: Foundation Dowel Tie-Ins & Setback Survey
Phase 01If your renovation includes a ground-floor room addition, bump-out, or secondary building footprint:
- Footing Dowel Tie-Ins: Inspectors examine how the new foundation connects to the existing home. Structural drawings specify 15M or 20M rebar dowels drilled into existing concrete with high-strength epoxy (6″ to 8″ depth).
- BCLS Forms Survey: Before pouring concrete walls, a registered BC Land Surveyor (BCLS) produces a legal Building Location Survey certifying that the addition strictly obeys front, side, and rear setback bylaws.
- Perimeter Weeping Tile: 4″ perforated drain pipe laid with washed crushed rock and tied into the storm connection, with damp-proofing asphalt on new concrete.
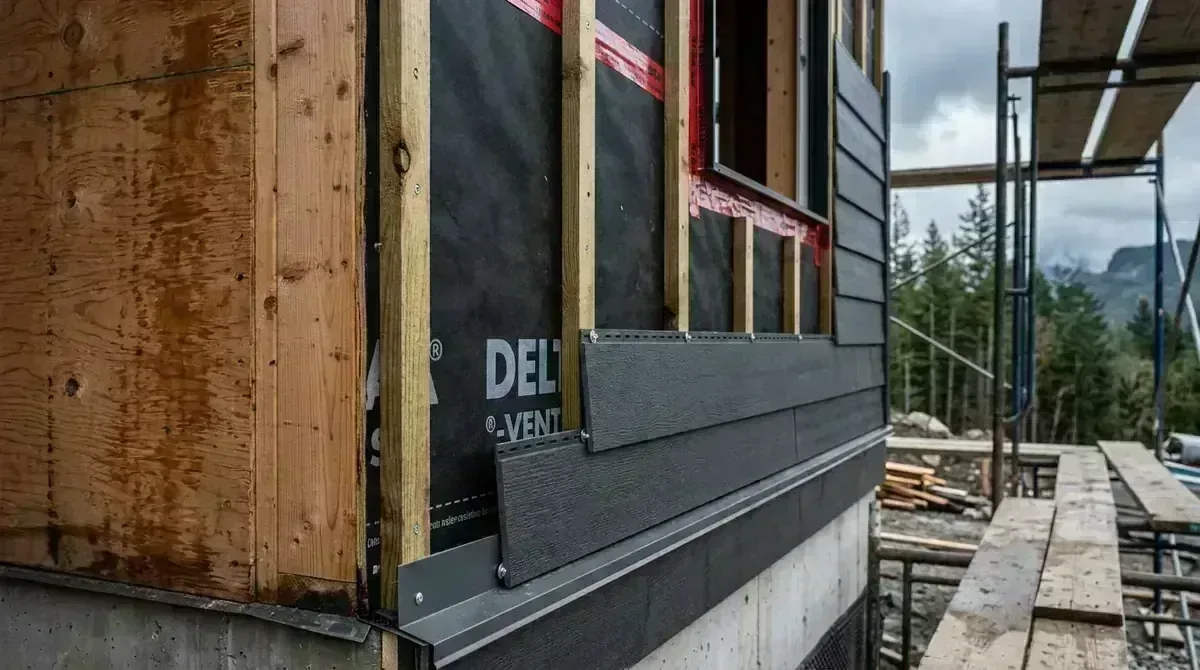
- Rain Screen Cavity & Flashings: For additions or siding replacements, building inspectors verify a continuous 10mm drainage cavity with vertical furring strapping, insect mesh at foundation base, and self-adhered membranes around window openings.
Step 2: Plumbing Rough-In & DWV Pressure Testing
Phase 02Before calling framing inspection, all new plumbing lines must be inspected under active test pressure:
- Drain, Waste & Vent (DWV) Testing: The entire drainage stack must be filled with water to a minimum 10-foot head (or 5 PSI air test) and held with zero pressure drop for at least 15 minutes.
- Potable Water Supply Testing: PEX or copper water lines must hold municipal line pressure (or 100 PSI air test).
- Secondary Suite Plumbing: Verifying dedicated shutoff valves, trap primers on floor drains, and shower pressure balance valves.
Step 3: Load-Bearing Wall Removals & Framing Inspection
Phase 03Removing interior walls for open-concept layouts is one of the most common residential renovation permits:
- Engineered Beam Sizing: Confirming installed beams match the structural engineer's stamped drawings (e.g., multi-ply LVL beams, Glulam timbers, or structural steel I-beams).
- Continuous Point-Load Transfers: Verifying that beam end-post loads transfer directly down through floor joists to solid blocking, basement posts, and reinforced concrete footings.
- Simpson Strong-Tie Connectors: Checking joist hangers, post caps, and structural screw patterns specified on the engineer's Schedule B.
Step 4: Thermal Insulation & Continuous Vapour Barrier
Phase 04- R-Value Compliance: Verifying fiberglass/mineral wool batts or continuous spray foam insulation match drawing energy notes (e.g., R-22 walls, R-28 ceilings, R-50 attics).
- Continuous Air/Vapour Barrier: 6-mil polyethylene sheet fully sealed with continuous beads of acoustical sealant at top/bottom plates and window rough openings.
- Vapour Barrier Hatches & Gaskets: Fire-rated electrical boxes on exterior walls sealed with poly gasket boots to prevent air leakage.
Step 5: Secondary Suite Fire Separation Drywall Inspection
Phase 05If legalizing a suite, this is the single most critical life-safety milestone:
- When to Call: Drywall hung on party walls, utility enclosures, and ceilings, but MUST NOT BE TAPED, MUDDED, OR PAINTED.
- Drywall Type: Verifying 5/8″ Type X firecode gypsum board as approved on the building permit plans.
- Fastener Spacing: Screws driven 7″ to 8″ on center along studs and resilient channels (RC-1) without breaking the paper face.
- Acoustic Channels & Caulking: Resilient channels at 16″ or 24″ on center and intumescent acoustic fire stopping sealing all penetrations.
Step 5: Final Trade Sign-Offs, Life Safety & Permit Closure
Phase 05Once plumbing, electrical, and gas have received final approvals, the municipal building inspector conducts final inspection:
- Bedroom Egress Windows: Unobstructed opening of at least 0.35 m² (3.77 sq. ft.) with no dimension less than 380mm (15″) and max sill height of 1.5m.
- Interconnected Smoke & Carbon Monoxide Alarms: Hardwired, interconnected alarms on all levels and inside all bedrooms with battery backup.
- Handrails & Guards: Continuous handrails (34″–38″ height) and guardrails (minimum 36″ interior / 42″ exterior) with <4″ baluster spacing.
- Permit Closure: Passing this inspection closes the building permit and issues the formal completion notice or Occupancy Certificate.
Summary: Interior Remodels vs. Home Additions
Overview| Construction Check | Interior Renovation / Basement Suite | Home Addition / Second Storey |
|---|---|---|
| Excavation & Footing Depth | Exempt (existing foundation remains) | Mandatory: Minimum 18″ frost depth & bearing soil review. |
| BCLS Property Line Survey | Exempt (interior walls don't affect setbacks) | Mandatory: Legal survey proving addition complies with setback bylaws. |
| Rebar Dowels to Existing Concrete | Exempt | Mandatory: Epoxy dowels into existing foundation walls. |
| Plumbing DWV Pressure Test | Mandatory: 10-ft head test on all new/moved pipes | Mandatory: Full plumbing rough-in sign-off. |
| Bearing Wall Beam Inspection | Mandatory for open-concept wall removals | Mandatory for roof tie-ins and structural openings. |
| Rain Screen Mockup & Flashing | Exempt (unless replacing exterior siding) | Mandatory: 10mm cavity, sill pans, and bug screens. |
| Fire Drywall (Pre-Tape Mud) | Mandatory for Suites: 5/8″ Type X drywall | Mandatory for attached garages or multi-unit additions. |
| Final Trade & Building Sign-Off | Mandatory: Closes building permit | Mandatory: Releases Occupancy Certificate. |
Top 5 Inspection Mistakes to Avoid on Renovation Sites
Guide1. Taping Drywall Before the Fire Inspection: If you mud or tape the joints before the inspector checks screw spacing and Type X stamps, the inspector will order you to strip or replace sheets. 2. Missing Point Load Blocking in Crawlspaces: Installing a massive steel or LVL beam upstairs without adding concrete pad footings and posts in the basement crawlspace is an automatic failure. 3. Calling Framing Before Plumbing & Electrical Sign-Offs: The building inspector will not look at wood framing until the plumbing DWV test and electrical rough-in permits are logged in the municipal database. 4. Undersized Bedroom Egress Windows: Old basement windows often fail the 3.77 sq. ft. clear opening requirement. Always verify egress window dimensions on your approved drawings before framing. 5. Leaving the Stamped Paper Plan Set Off-Site: If the inspector arrives and the full-size city-stamped drawing set is not on site, the inspection is cancelled on the spot, and a re-inspection fee will be charged.
Related Permitting & Inspection Guides
Guide- New Construction Inspections: New Custom Home & Multiplex Inspections Checklist
- Commercial TI Inspections: Commercial Tenant Improvement Inspections Guide
- Master Permitting Process: Complete 8-Step BC Permit Approval Lifecycle
- Get Professional Help: Request a Free Project Consultation with Canadian Blueprint →

Canadian Blueprint Inc.
BC Building Design & Permit Drawings
Published • Updated